Seasons by the Sea: You Can Can, Too

Why pickle, can, and preserve? The best reason is because of where we live. The bounty of fruits and vegetables available to us makes the effort worthwhile. It is also satisfying and economical. And the little jars of what you have made make swell gifts.
My personal experience with jams and pickles is extremely limited. Why? Because I am a chicken. The sight of a pressure canner makes me nervous, pectin calculations require math, and there is that little nagging fear of botulism, a rare but deadly food-borne illness most often found in canned meat or fish. I have pickled cornichons, made strawberry jam (froze it), and beach plum chutney, also froze it. Here’s the good news: You really don’t need a pressure canner, a lot of recipes don’t require pectin, and botulism is, in fact, extremely rare.
What kind of equipment do you need? Plenty of Ball or Mason jars with either two-piece lids or single rubberized lids and a large straight-sided pot with a lid. It should be wide enough to fit six pint jars or four quart jars, and deep enough so you can submerge the sealed jars by at least an inch of water with a few extra inches to keep boiling water from spilling over. You also need a rack for the bottom of the pot to keep jars elevated. You can use a cake rack or even a folded kitchen towel for this. A weight scale, wide mouth funnel, ladle, clean wooden spoon, thermometer, and cheesecloth are also necessary for most projects. Beyond that, food mills, strainers, mandolines, and microplaners are tools that will make the job go faster.
There is good deal more to know when canning and preserving so I recommend you consult Ball Jar’s Web site or get a good book on the subject, such as “Saving the Season” by Kevin West. The Ball Jar web site is simple and entertaining, a bit like building a car online. You choose your fruit, then determine whether you are making jam or jelly, then pick the pectin of your choice: classic, low or no sugar, or instant. They calculate the recipe for you.
Here are some basic guidelines to get you started. To prep jars, wash them in hot soapy water. No need to sterilize; the boiling water will pasteurize the sealed jars along with their contents. Jars and lids should be warm when you fill them; keep these in a 200 degree oven until ready. Do not fill jars to the rim, each recipe will tell you how much “head space” is needed. Use a ruler. When sealing, don’t screw on the lid too tight!
For processing, have your pot of water already hot. When you add the jars, bring pot to a rolling boil and begin your processing countdown from this point on. When done, remove jars and leave on cutting board or kitchen towel overnight. Do not place directly on a cold stone or marble counter. This could crack the jars. The next day, check the seals. Remove the ring and press on center of lid. If it moves, or if the “button” in the center flexes, the seal has failed to set. The product is still safe to eat, but must be refrigerated.
Before storing, wipe the jars with a damp cloth, then dry with a towel. Store the jars without their rings in a cool dark place like a basement or cupboard. Jams and pickles will keep for a year. More delicate, low-sugar jams are best eaten within six months. Marmalades and fruits in alcohol will keep several years.
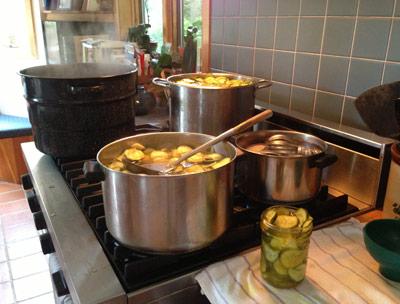
Here is how my friend and colleague Jane Bimson makes her famous Nana’s Pickles, which you may have seen at Vickie’s Veggies and Stuart’s Seafood . . . if you’re lucky! Sadly, the recipe is a family secret, but she shared the process with us.
Jane’s grandmother Nana B. always made these in West Brookfield, Mass., with cucumbers from the family garden. Jane started making them as holiday gifts for family and friends. With help from her husband, Steve, she slices the cukes and onions and leaves them overnight in salted ice water. After draining she adds her special pickle juice and lets them stand for a few hours or overnight again. The pickles are then brought to a boil, canned, and placed in a water bath for 10 minutes. They have made 30 cases so far this summer!
Now here are a few recipes to get you started.
Click for recipes
